How to Make a Leather Bag: A Beginner Walkthrough From Pattern to Strap
Published How we research
A first leather bag does not need to be complicated. A simple tote, pouch or small crossbody can be built from a few flat panels, a gusset or fold, a strap and a closure, and every step teaches a skill you will reuse. The trouble is that bags put real stress on stitching and straps, so shortcuts show up fast when the bag is loaded. This walkthrough covers how to plan a bag, choose leather and hardware, build a pattern, cut and prepare the pieces, stitch and assemble them, and finish edges so the result looks clean and holds up in daily use.
Products from this article
The highest-scoring picks from the buying guides this article links to. Scores are our editorial assessment, not customer ratings.
As an Amazon Associate we earn from qualifying purchases. This does not change our picks. Affiliate disclosure
New to Prime? Try Prime free for fast, free shipping on eligible items.
+ Waxed thread and stitching punches cover hand sewing
From our guide: Best Leather Starter Kits for Beginners
+ Organizer case keeps all 458 Pcs in order
From our guide: Best Leather Working Kits for Every Skill Level
+ Two piece setting tool shapes rivet caps neatly
From our guide: Best Rivet Setters and Setting Tools
+ Includes dyes as well as tools and stamps
From our guide: Best Leather Starter Kits for Beginners
Pick a simple design first
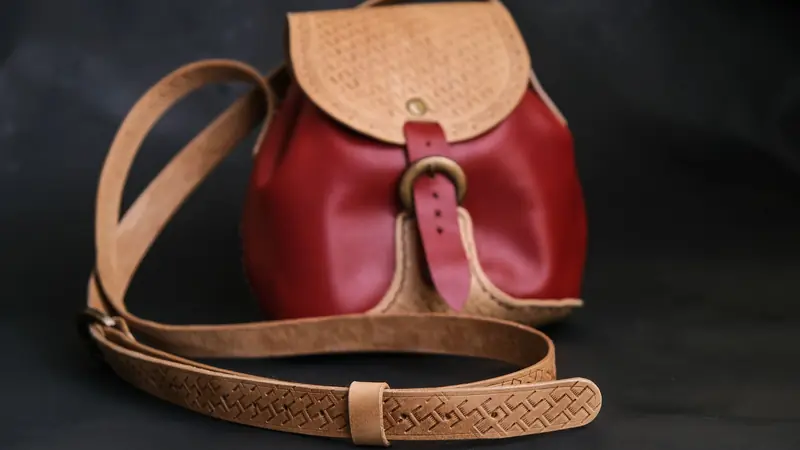
Begin with a shape that has few curves and few layers, such as a flat pouch, a zip pouch or a simple tote with two straps. Each extra pocket, gusset or lining multiplies the stitching and the chance of error, so save those for the second or third bag.
Sketch the bag at full size, noting the width, height, depth and where the strap attaches. Think about what it will carry, because a bag for light items can use thinner leather than one meant for books or a laptop.
Choose the leather and weight
Bags usually need leather that is firm enough to hold shape yet bends easily. Many makers use medium-weight vegetable-tanned leather for structured bags and softer chrome-tanned or pull-up leather for slouchy designs. A medium range often suits straps and panels, while a lighter weight suits linings and pockets.
Buy a little more than the pattern needs, since hides have scars and thin areas you will cut around. If you are unsure about weights, our leather weight guide explains what the ounce figures mean in practice.
Gather tools and hardware
You will need a sharp knife or shears, a straightedge and cutting mat, an awl or pricking iron for stitch holes, needles, waxed thread, an edge beveler and burnishing supplies. Hardware depends on the design: rivets for strap ends, snaps or magnetic clasps for closures, a zipper for a pouch and D-rings or swivel clips if the strap detaches.
Choose hardware sized to the leather thickness and strap width, and check the maker's notes on what it supports. Knives and awls are sharp, so cut away from your body and keep fingers clear of the blade.
Make a pattern and test it in paper
Draw each piece on card stock, mark the stitch lines and any fold or slot positions, and cut the card patterns out. Assemble the paper version with tape to check proportions, strap length and whether your hand fits through the opening.
Fixing a mistake on card costs little, while fixing it in leather wastes the hide. Keep the final patterns, because they let you remake the bag or adjust it later.
Cut and prepare the pieces
Trace the patterns on the flesh side with a scratch awl, or on the grain side only when you can remove the marks. Cut with long, steady strokes on a mat, and use a sharp blade, since dull ones tear the leather and drift off the line.
Skive or thin the places where leather folds over or layers join, such as strap ends and seam allowances, so they sit flat. Bevel the edges while the leather is still flat, then dye or finish the pieces before assembly if you want even color.
Stitch and assemble
Mark the stitch line with a groover or wing divider, punch evenly spaced holes with chisels or an awl, and sew with a saddle stitch for the strongest seams. Glue pieces together first with a leather cement so they stay aligned while you stitch.
Reinforce the stress points, such as strap attachments and the top corners of the opening, with extra stitches or rivets. Back-stitch a few holes at the end of each seam, and keep the thread tension even so the seam stays flat.
Add a lining or edge reinforcement if needed
Unlined bags are the simplest to build, and the flesh side of veg-tan leather can be finished to look neat. If you want a lining, cut it slightly smaller than the outer panels, glue it in place with a thin layer of cement and stitch it along the top edge so it does not shift.
Thin leather or fabric works for lining, and a bit of extra stiffening at the top edge helps the opening keep its shape. Keep the layers as thin as you can near seams so the stitching does not have to push through too much material.
Attach straps and closures
Straps carry the load, so make them from a wide enough piece and anchor them to the body with rivets plus stitching, not glue alone. Test how the strap feels by loading the bag with a typical weight and carrying it around before you finish the edges.
Fit snaps or magnets according to the instructions, working on scrap first to learn the force needed. Our article on setting rivets and snaps covers the common problems.
Finish the edges and surface
Sand the edges lightly, apply edge paint or burnish them with water or gum and a slicker until smooth, and wipe the bag with a leather-safe finish for protection. Test any dye, sealer or conditioner on scraps first.
Let the finish cure fully before packing the bag and avoid overloading it in the first weeks while the stitches and glue settle. Use dyes and finishes in a ventilated space and follow the label advice.
Common mistakes to avoid
The usual problems are leather that is too thin for the load, straps held on by glue alone, and stitch holes punched too close to the edge, where the leather can tear under strain. Rushing the pattern stage also causes crooked seams and openings that are too small.
Take your time with the first bag and treat it as practice. Write down what you would change, such as strap length or pocket size, and use those notes for the next version. Small adjustments from bag to bag add up quickly.
Popular right now
- Setting Rivets and SnapsArticle
- Best Pricking Irons for Clean, Slanted Saddle StitchesBuying guide
- Best Gum Tragacanth and Burnishing Agents for Leather EdgesBuying guide
- How to Dye Leather EvenlyArticle
- Choosing Your First Leather KnifeArticle
- Hand Stitching vs Machine Stitching LeatherArticle
Based on the last 28 days of search and visitor data.